
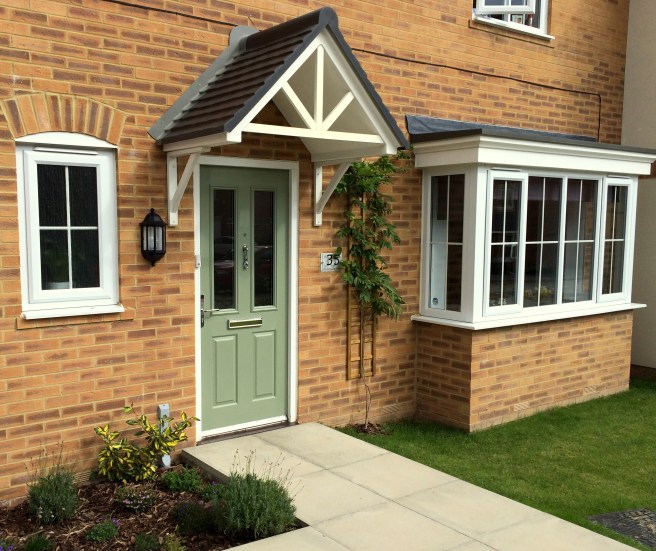
We have been so focused on decorating our house on the inside we completely neglected the outside space. There are many reasons why we wanted to change the outside look of our house. As you know we own a new build house in the estate full of houses similar to ours and we wanted our house to be a little bit different; particularly our dull black front door which looked exactly like every other door on the estate. So that was the first reason. The second reason was ‘Fall has come’, a year has passed since we moved in and it was time for a change. So here it goes our Front Door Remodel.
1. Tools

2. Preparing
You don’t have to remove your door in order to paint them, but it’s advised that you remove all hardware (letterbox, knocker, handle).
Protect hinges and glass panels with frog tape.


3. Sanding
We didn’t prime the door before painting because we used Dulux Weathershield in Green Glade ‘no primer needed’. We just gave the door a light sand.
ALWAYS check on the tin if primer is needed!

4. Painting
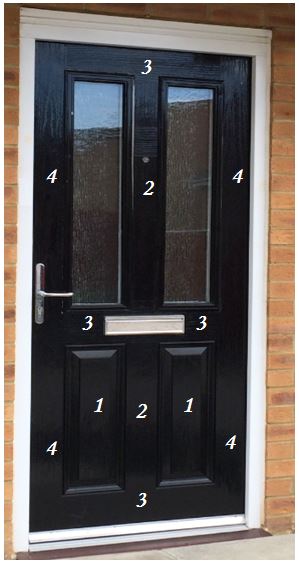
Follow the numbers in the picture below.
Firstly paint the inside panels (1) then paint the centre vertical part of the door (2). After that proceed with horizontal parts of the door- top and bottom frame as well as the middle section(3). Finish with vertical panels on each side (4). Tip (When painting always follow direction of the door wood grain).
Apply as little paint as possible each time. Its better to apply more coats of paint rather than to strip it off because of unpleasant drips and puddles.
5. Finishing touches
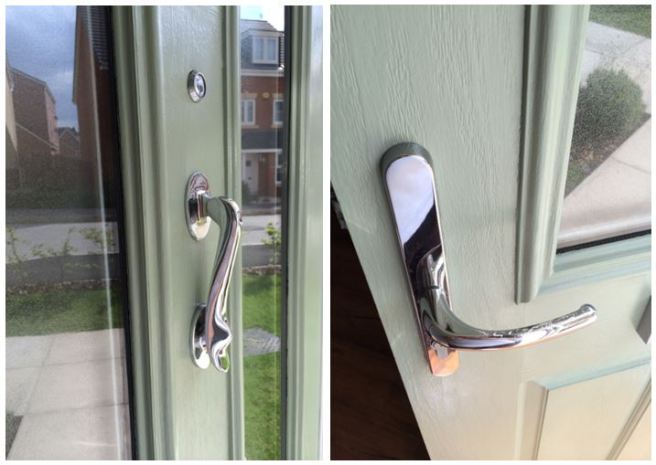
This is were you can go as creative as you please: fancy door handles, house numbers, door knockers, vintage letterboxes- you name it! We decided to keep our old polished metal door handle and letterbox, but we bought a matching door knocker in B&Q.
Let me know what you think about my Front Door Remodel.
Have you ever repainted your front door? what are your tips?
Share your ideas below in comments section.
